Using Joplin for Travel Research
Joplin is an open-source note taking application available for Windows, Mac OS, iOS and Android. It’s very similar to Evernote, if you’re familiar with that: you make a bunch of note files and organize them into notebooks, basically. And did I mention it’s free?
I’ve been using Joplin to organize my travel research for the last 6 months or so, and it’s been a WONDERFUL tool for me.
I get asked quite a bit about how I organize my notes, so I figured I’d write a post for y’all and sing the praises of one of my favorite apps.
Just Gone Wandering is supported by readers! This post contains affiliate links. If you click on a link and buy something, I get a small percentage at no extra cost to you. Your support helps keep this blog running— thank you! Read full disclosure here.
new!
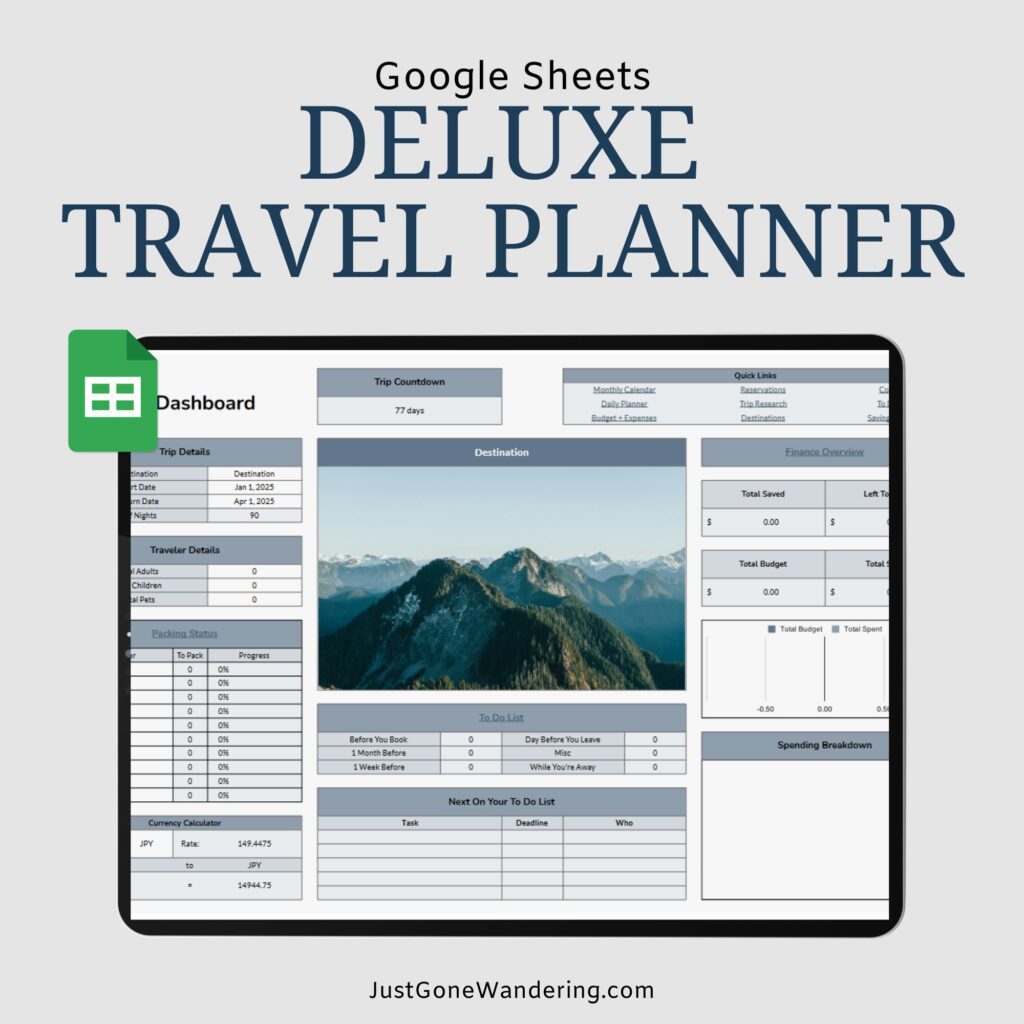
Effortless Trip Planning, All in One Place
Say goodbye to disorganized travel chaos! Everything you need, from pre-trip planning to your daily itinerary to your return home, in one simple tool.
How I use Joplin for travel research
The important thing is to stay organized, so I set myself up for success by creating multiple notebooks to sort notes into.
I have one notebook for each continent/region, then sub-notebooks for each country. (I also have individual notebooks for general travel, packing, housesitting, digital nomad stuff, packing and seasonal work– things related to traveling but not necessarily location-specific.)
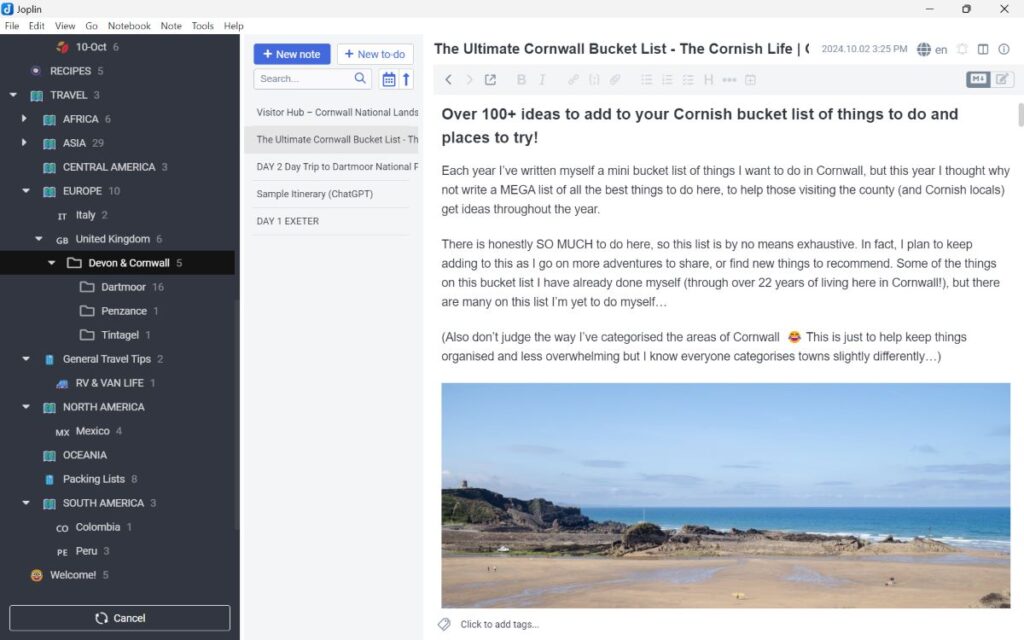
When I’m actively researching a trip, I make ANOTHER sub-notebook just for that trip. For instance, I’m planning a tour around the Devon and Cornwall area next year and I have a lot to research to do, so I made a separate notebook just for that trip.
Tagging, organizing, etc.
Another option is to tag notes with the city or county location, or even with the trip name. That’d work better if you don’t want to keep making sub-notebooks nested into each other, or if you want to tag, like, monastery stays from multiple countries and be able to pull all that info together in one place easily.
(The search does a similar thing, but it’s dependent on what text is in the note. If you have a specific topic you want tagged it’s better just to do it yourself.)
Web clipper
Once I have my notebooks set up, I can get to researching.
I have the Joplin Web Clipper on my desktop browser, and I use it for EVERYTHING. I look up local tourism websites, blog posts, recommendations in Facebook groups, random Threads or Instagram posts, whatever I can find that is useful to my trip, and I save it into the corresponding notebook using the Clipper.
Here’s what it looks like:
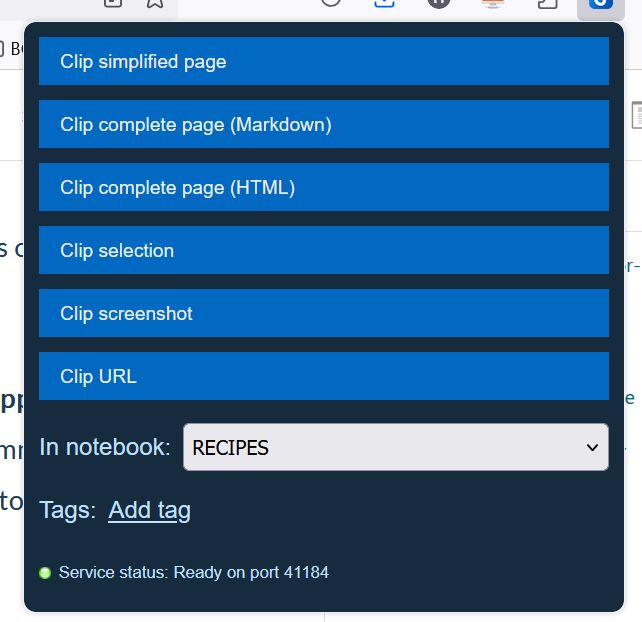
The Joplin Web Clipper has a few different modes. You can save entire webpages, simplified versions, just the text or even just the URL.
I tend to use the simplified webpage option the most, because it works the best at grabbing all the relevant info without bloating the note with HTML/images. If I only need a short part of a website, like a few paragraphs of text, I’ll just use the clip selection option.
For Facebook group posts or other forum threads, I copy-paste the text with the date and either a link to the thread or the name of the FB group. The web clipper doesn’t clip comments, and usually that’s where the best info is anyway so I do have to do that manually.
Attaching things
Another great feature in Joplin is you can attach files, images and screenshots to notes!
So all those random PDF maps that tourist websites like to give out, but get lost immediately on your desktop? Attach it to a note and BAM, there is it forever– and properly organized into a location notebook, too.
Or if you watch a TikTok video or Youtube vlog that has a lot of informative text? Just screenshot it and you can attach that screenshot to a note.
Post-research compiling
Once I’ve accumulated as much info as I want, I make a Master Research Note. This is where I compile everything I need into one big note and name it something easy I can find again, like [MASTER] Devon & Cornwall Trip Planning.
I usually write down specific places I want to visit, packing notes, bits of history of the local area, etc. and I link directly to the notes that the info comes from. This is also where I keep my itinerary (if I have one), and recommended restaurants, stores, tours, whatever. I then refer back to this whenever I make my bookings!
Syncing between devices
Joplin has a desktop app and a phone app. To sync between the two, you’ll need to set up something in the cloud– I use Dropbox– and then it’ll automatically update each Joplin instance whenever you make a change.
This is extremely useful for when I’m on the phone looking at some Facebook post or random Google search. I can save that note to my Joplin phone app, and then have it show up on my Joplin desktop app whenever I want to do more research.
Final thoughts
Joplin has made collecting travel research from around the web VERY easy for me. There’s a lot more neat things that Joplin can do (the desktop version has plugins that extend its capabilities, for instance), but this is the basic set-up I use for my travel research.
I used to have to keep switching between websites trying to find all the posts and comments I saved, and it was very annoying. Because I have a centralized location to keep all my research in now, I’m better able to plan my trips because I’m not constantly scrambling for all the info that I KNOW I have somewhere. Yay!
Save to Pinterest

Explore More
Travel Technology
- Why You Need a VPN When Traveling
- The Ultimate Tech Guide for Full-Time Travelers
- How to Keep in Contact While Traveling Abroad
- The BEST WhatsApp Travel Group Chats
- Digital Nomad WhatsApp Group Chats
- Free Movies & TV Shows to Watch on Youtube (When You’re Abroad)
- 90+ Active Facebook Groups for Travelers
Best Travel Resources
- 👩💻Stay organized with the Deluxe Travel Planner Spreadsheet
- 🛌Search Hostelworld for budget stays
- ✈️Search SkyScanner for discounted flights around the world
- 😺Join TrustedHousesitters and do petsitting in exchange for accommodation
- 💳Carry Chase Sapphire Preferred for a travel-friendly credit card
- 📱Use Airalo for eSIMs around the world
- 🚙Check DiscoverCars for international car rentals
- 👩💻Snag ExpressVPN to stay safe while browsing the web
- 🧑⚕️Sign up with VisitorsCoverage for trip insurance


